Growing tomatoes in a pot
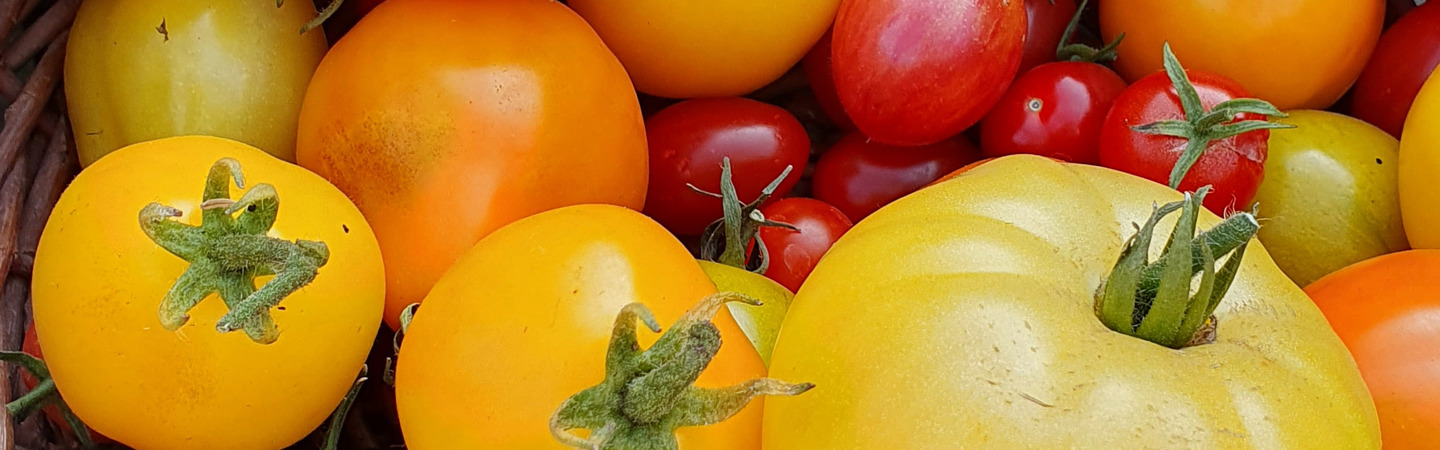
In recent years, tomatoes have become available in supermarkets in ever more varieties and colours: from French beef tomatoes to mini orange cherry tomatoes. Of course, they all have the classic taste of a tomato, but they may offer a different hint of sweetness or acidity depending on their variety. How fun would it be to grow your own special varieties that aren’t sold in the supermarket! Even without a garden or large balcony, you can still grow your own tomatoes. A pot is all you need! elho offers the ideal growing pot, perfectly sized for a tomato plant. Ready to get started? Read on to find out more about how to grow your own tomatoes.
Growing process
Step 1 // Start sowing
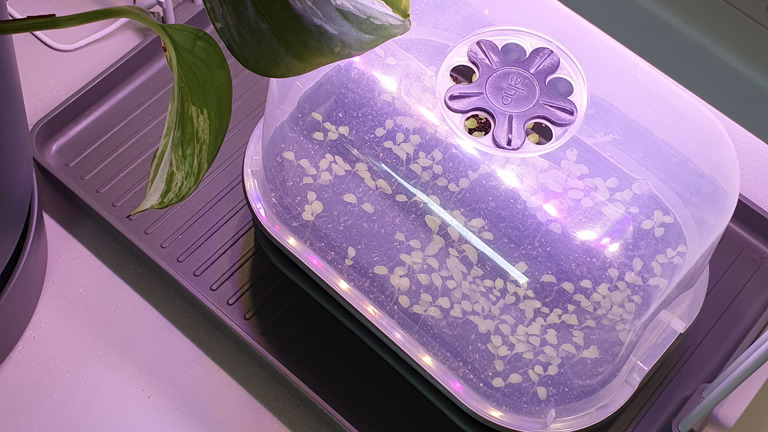
It’s best to start your tomatoes indoors because tomato plants like warmth. In cold temperatures, the seeds won’t germinate and the plant will hardly grow. To give the plant a head start for both its growth and harvest, you should first sow it indoors.
The plants need about 8 weeks to grow big enough before they can go outside and be planted in a pot. For sowing, I use the grow house combined with the grow tray and a grow tray saucer underneath. Make sure to use the appropriate soil for seedlings and water the seeds with a plant sprayer after sowing.
Shops usually offer plants from around March/April, but of course you can also grow them yourself. This is what I personally enjoy the most: seeing a plant grow beautiful red, yellow, or even purple fruit. The most suitable tomato varieties for growing in a pot are Pingpong Tomato '42 Days' or Tiny Tim (which does not need to be pinched*). You can buy the seeds online, at the garden centre, or in seed shops.
*more information on pinching can be found under Step 4 // Care
Step 2 // Repotting
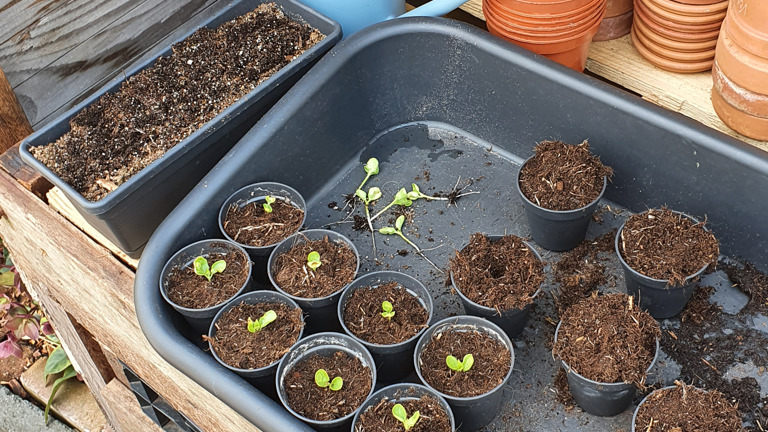
Repot the seedlings when they’ve grown 4 leaves. You’ll notice that the plants are bigger, and perhaps you’ll even see the leaves starting to turn a lighter colour. This indicates that the nutrients in the soil have been used up and that the plants need a different home. Take some small cultivation pots and use universal potting soil to transfer the plants. Carefully remove the seedlings from the seedling tray without damaging the roots and transplant them. Lightly press the soil around them and water with a small watering can.
Place the small cultivation pots in a spot with plenty of daylight. The more daylight, the better the seedlings will grow. Every week, turn the small cultivation pots so that a different side faces the light to prevent them from growing tall and lanky. If you don’t have a place to put your seedlings, you can also use products like light garden, plant light care, or leaf light care to expose them to more light.
If you notice that the leaves start to change colour again during the five weeks before mid-May (which is when it’s safe to move the plant outside), you can repot the plant into a larger pot with new potting soil.
Step 3 // Transplanting into the tomato pot
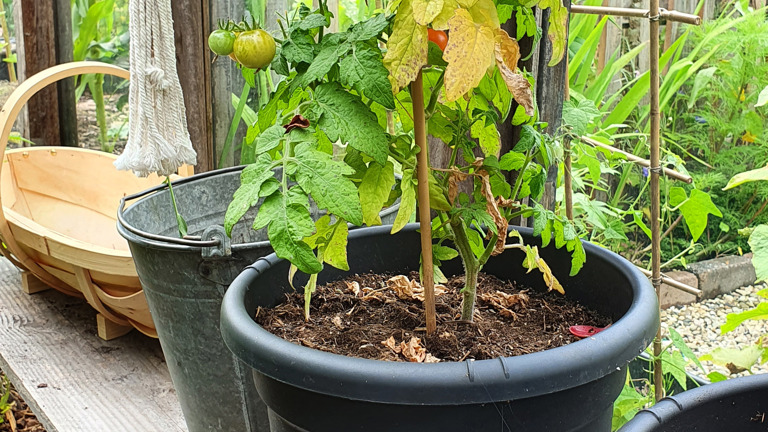
After 15 May, it’s time to transplant your tomato plant in the pot. Always make sure to plant only one plant in each pot so that it has enough space and nutrition to grow effectively. With the elho tomato pot, you don’t need to provide extra support for the plant, as the pot itself comes with supporting rings that the plant can lean against. If you choose to a plant a variety that stays small, it will never grow beyond the rings. To ensure optimal growth, we advise using organic potting soil when transplanting, as this contains enough nutrition for 3 months.
Step 4 // Care
Your plant needs extra care if you want to harvest tomatoes, so it must be pinched back and eventually topped when it reaches a certain height. But what exactly is pinching, and when should the plant be topped?
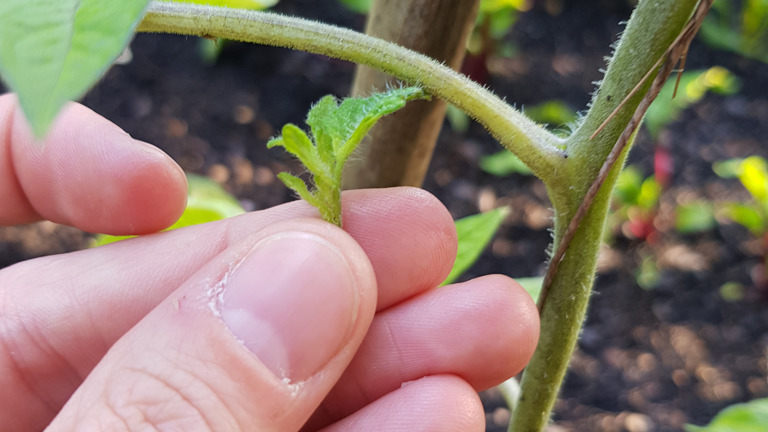
Pinching
This is the removal of the axillary shoots that arise on the main stem and side branches of the plant. If you don’t remove them, the plant will use up a lot of energy in growing new leaves instead of new flowers. The flowers will eventually become tomatoes that you can harvest. Make sure to check for these shoots every week, and if you see any, break them off with your thumb and index finger.
Topping
If you’ve opted for a large plant variety, you top the plants as soon as they grow higher than the rings of the tomato pot. By breaking off the top, you encourage the plant to use available nutrients to develop the fruit instead of creating new leaves.
Watering
Tomatoes don’t like a lot of water. The great advantage of plants in a pot is that you can water them very specifically at the base of the plant. Do this twice a week in spring and once a week in summer. By watering via the integrated saucer at the bottom of the pot, you stimulate its roots to look for water. The roots will reach deeper, and the plant will become much stronger. Moreover, the chance of disease is much smaller, and the plant will yield more fruit. If you water your plant on top of the soil, the roots will stay just below the surface and the plant will dry out more quickly. This is why you should give the plant more water when using the integrated saucer. The elho tomato pot has a handy water reservoir so that the plant can absorb what it needs.
Feeding
Over time, tomato plants in a pot need feeding. If you use new soil every year when you plant them, it’s sufficient to feed them just before the flowers start to grow fruit. I always use a liquid fertilizer that can be mixed with water. You can buy this at the garden centre or at the supermarket. Another option would be to use liquid concentrate from the compost bin or worm bin.
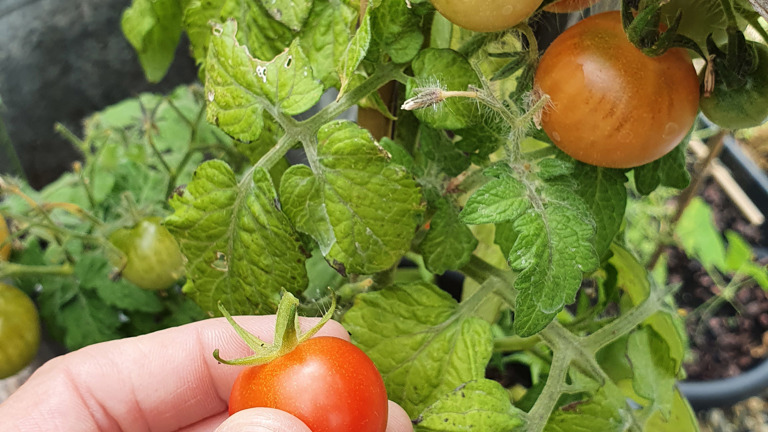
Step 5 // Harvesting
Tomato plants can take up to 6 months to go from seed to harvest. Leave the plant in the sun and water it every now and then. Remove the excess shoots and before you know it, it’s harvest time! Harvesting can be done in August, September, and October. Of course, the moment of harvest depends on the variety and size of the plant. This information can be found on the back of the seed packaging.
Step 6 // Taking the plant inside
Unfortunately, we don’t all live in a climate where it’s warm all year round, so we can only expect a tomato harvest in the months of August, September, and October. After October, the tomatoes will no longer develop colour. The big advantage of tomatoes grown in pots is that after October, you can still bring them inside so that they can continue developing their lovely colours. After that, it’s best to empty the pots, clean them, and store them for the next season.